
_600px.jpeg)
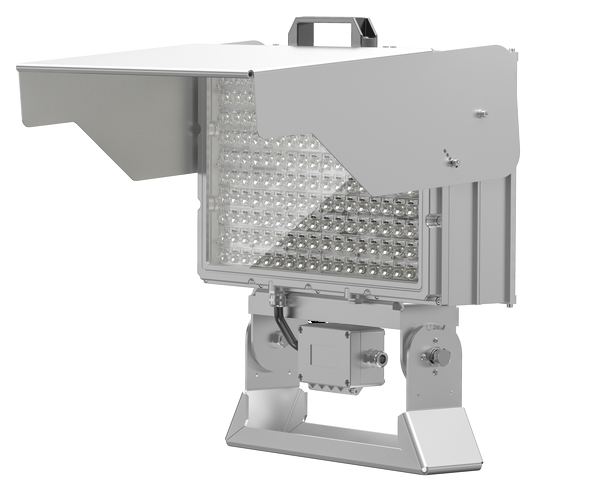
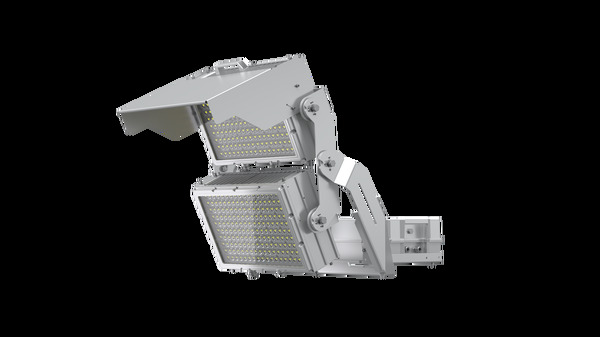
The Artemis II series stands out as an impressive solution for both racking and open industrial environments. Leveraging cutting-edge optical lens technology, Artemis II ensures precise light distribution, minimising the need for multiple fixtures and reducing overall energy consumption. Renowned for its exceptional efficiency, the Artemis II product line can seamlessly integrate with various intelligent solutions to further achieve energy savings, such as screw-in microwave or PIR sensors.
• Astonishing efficiency up to 195lm/W
• Racking or open lens options
• Standard, self-test emergency and DALI-2 solutions available
• Plug and Play m/wave and PIR sensor technology available
• 7 year warranty
APPLICATIONS
Warehouse racking, sports halls, manufacturing and retail.
Also available in this range
Lorem ipsum dolor sit amet, consectetur adipiscing elit.
All Novah products


Apollo 1200W Sports Flood with Asymmetric Beam


Gemini Select 90/113/137/161W Rack Beam


Sirius V High Bay (60°) 90-150W 220lm/W Selectable Outputs + Self-test Emergency
Sirius V High Bay (60°) 90-150W 220lm/W Selectable Outputs + Emergency
Sirius V Low Bay (90°) 90-150W 220lm/W Selectable Outputs + Self-test Emergency
Sirius V Low Bay (90°) 90-150W 220lm/W Selectable Outputs + Emergency

Barracuda IV 6ft 64W Non-Corrosive 3CCT DALI 2.0
Barracuda IV 6ft 36-64W CCT Non-Corrosive Non-Corrosive with Corridor Function
Barracuda IV 6ft 36-64W CCT Non-Corrosive Non-Corrosive + Self Test Emergency
Barracuda IV 5ft High Output 55W 3CCT Non-Corrosive + DALI 2.0
Barracuda IV 5ft High Output 31-55W 3CCT Non-Corrosive with Corridor Function
Barracuda IV 4ft 36W 3CCT Non-Corrosive DALI 2.0
Barracuda IV 4ft 21-36W 3CCT Non-Corrosive with Corridor Function
Barracuda IV 2ft 10-17W 3CCT Non-Corrosive + DALI 2.0

Solray Select III 6ft LED Batten 35-62W 3CCT with Self-Test Emergency + Microwave Sensor
Solray Select III 6ft LED Batten 35-62W 3CCT with Self-Test Emergency

Solray Select III 5ft High Output LED Batten 30-53W 3CCT with Self-Test Emergency + MW Sensor ON/OFF
Solray Select III 5ft High Output LED Batten 30-53W 3CCT with Self-Test Emergency
Solray Select III 4ft LED Batten 20-34W 3CCT with Self-Test Emergency & Microwave Sensor
Solray Select III 4ft LED Batten 20-34W 3CCT with Self-Test Emergency
Barracuda IV 4ft 21-36W 3CCT Non-Corrosive + Self Test Emergency
Barracuda IV 5ft High Output 31-55W 3CCT Non-Corrosive + Self Test Emergency
Gemini Select 90/113/137/161W Wide Beam
_1000px.png)
Barracuda Xtreme 2ft 10-17W 3CCT Non-Corrosive
Barracuda Xtreme 6ft 36-64W 3CCT Non-Corrosive
Barracuda Xtreme 5ft High Output 31-55W 3CCT Non-Corrosive